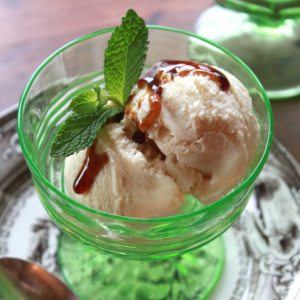

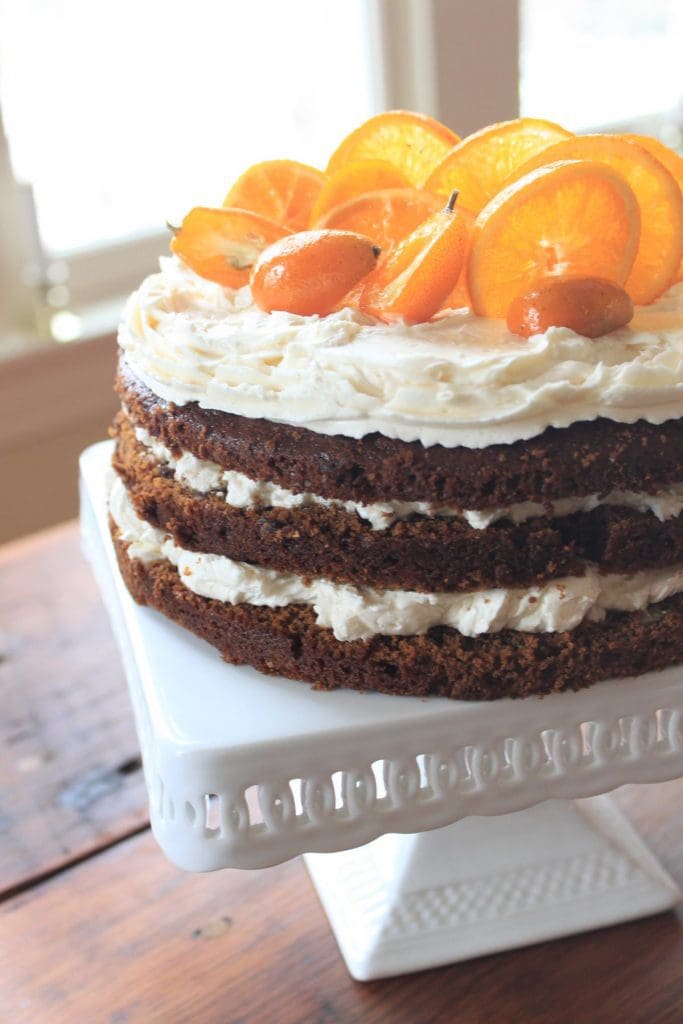
Because I often spend the bulk of my work week decorating reaaally detailed cookies, I like to unwind when it comes to other baking, especially during the jam-packed holidays. This season, I did a quick version of my Nana’s Gingerbread Cake, layered simply with Eggnog Buttercream – a cake recipe originally paired with crème anglaise for Fine Cooking magazine.
Yield: 2, 9-inch cakes, layered with icing – or not! This cake is incredibly moist on its own, thanks to all the butter and molasses – and steaming!
Prep Talk: If you plan to layer the cakes with icing, allow enough time for the cakes to fully cool (or the icing will melt). The cakes can be frozen up to 1 month with no loss of flavor or texture if wrapped tightly in plastic and then foil.

Ingredients:
Method:
1 | Prep the steam bath and pans. Position one rack in the center of the oven and another beneath it in the lowest slot. Place a large baking pan on the bottom rack and fill the pan about halfway with boiling water. Heat the oven to 350°F. Lightly coat two 9 x 2-inch round cake pans with nonstick cooking spray and line the bottoms with parchment paper. Apply another light coat of nonstick cooking spray to the paper.
2 | Mix the batter. Sift the flour, ginger, cinnamon, cloves, baking soda, and salt together in a large bowl. Place the chopped dates in a small bowl with a few tablespoons of the flour mixture. Pull apart any date pieces that may be stuck to one another and toss to evenly coat with the flour. (This will prevent the date pieces from any further sticking.)
Grind the coriander seeds to a fine powder in a coffee or spice grinder, if you have one. Alternatively, seal the coriander seeds inside a re-closable plastic bag and use a rolling pin to finely crush them.
Place the softened butter in the bowl of a stand mixer fitted with a paddle attachment. Cream on medium speed until soft and smooth. Gradually add the sugar and continue to beat on medium speed for about 2 minutes, until light and fluffy. Scrape down the sides of the bowl, add the molasses, and beat again on medium speed, just until the molasses is evenly incorporated. Add the eggs, one at a time, scraping down the bowl as needed between eggs.
Turn the mixer to very low speed, or if you prefer, do all remaining mixing by hand. (A 4-quart mixing bowl will start to get pretty full, so hand-mixing is sometimes easier and less messy.) Blend in the reserved flour mixture in three additions, alternating with the boiling water and beginning and ending with the flour. Mix just until each addition is incorporated and no longer, as over-mixing will lead to a tougher cake. Stir in the reserved date-flour mixture, ground coriander seeds, and chopped walnuts. (The batter will be quite loose.)
3 | Bake the cakes. Immediately divide the batter equally between the two prepared pans. Place both pans on the top oven rack and bake until a toothpick inserted in each cake center comes out clean, or 45 to 50 minutes. Let the cakes cool in their pans about 10 minutes. Then invert them onto racks and peel off the parchment paper. (Allow the large baking pan to cool in the oven until it can be safely moved without spilling hot water.)
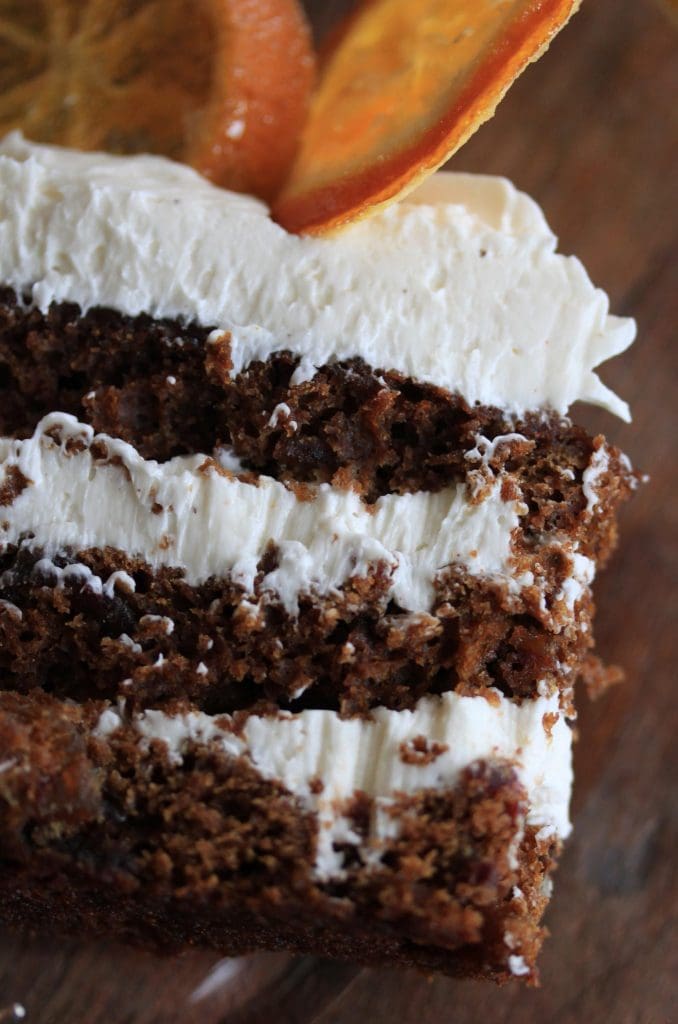
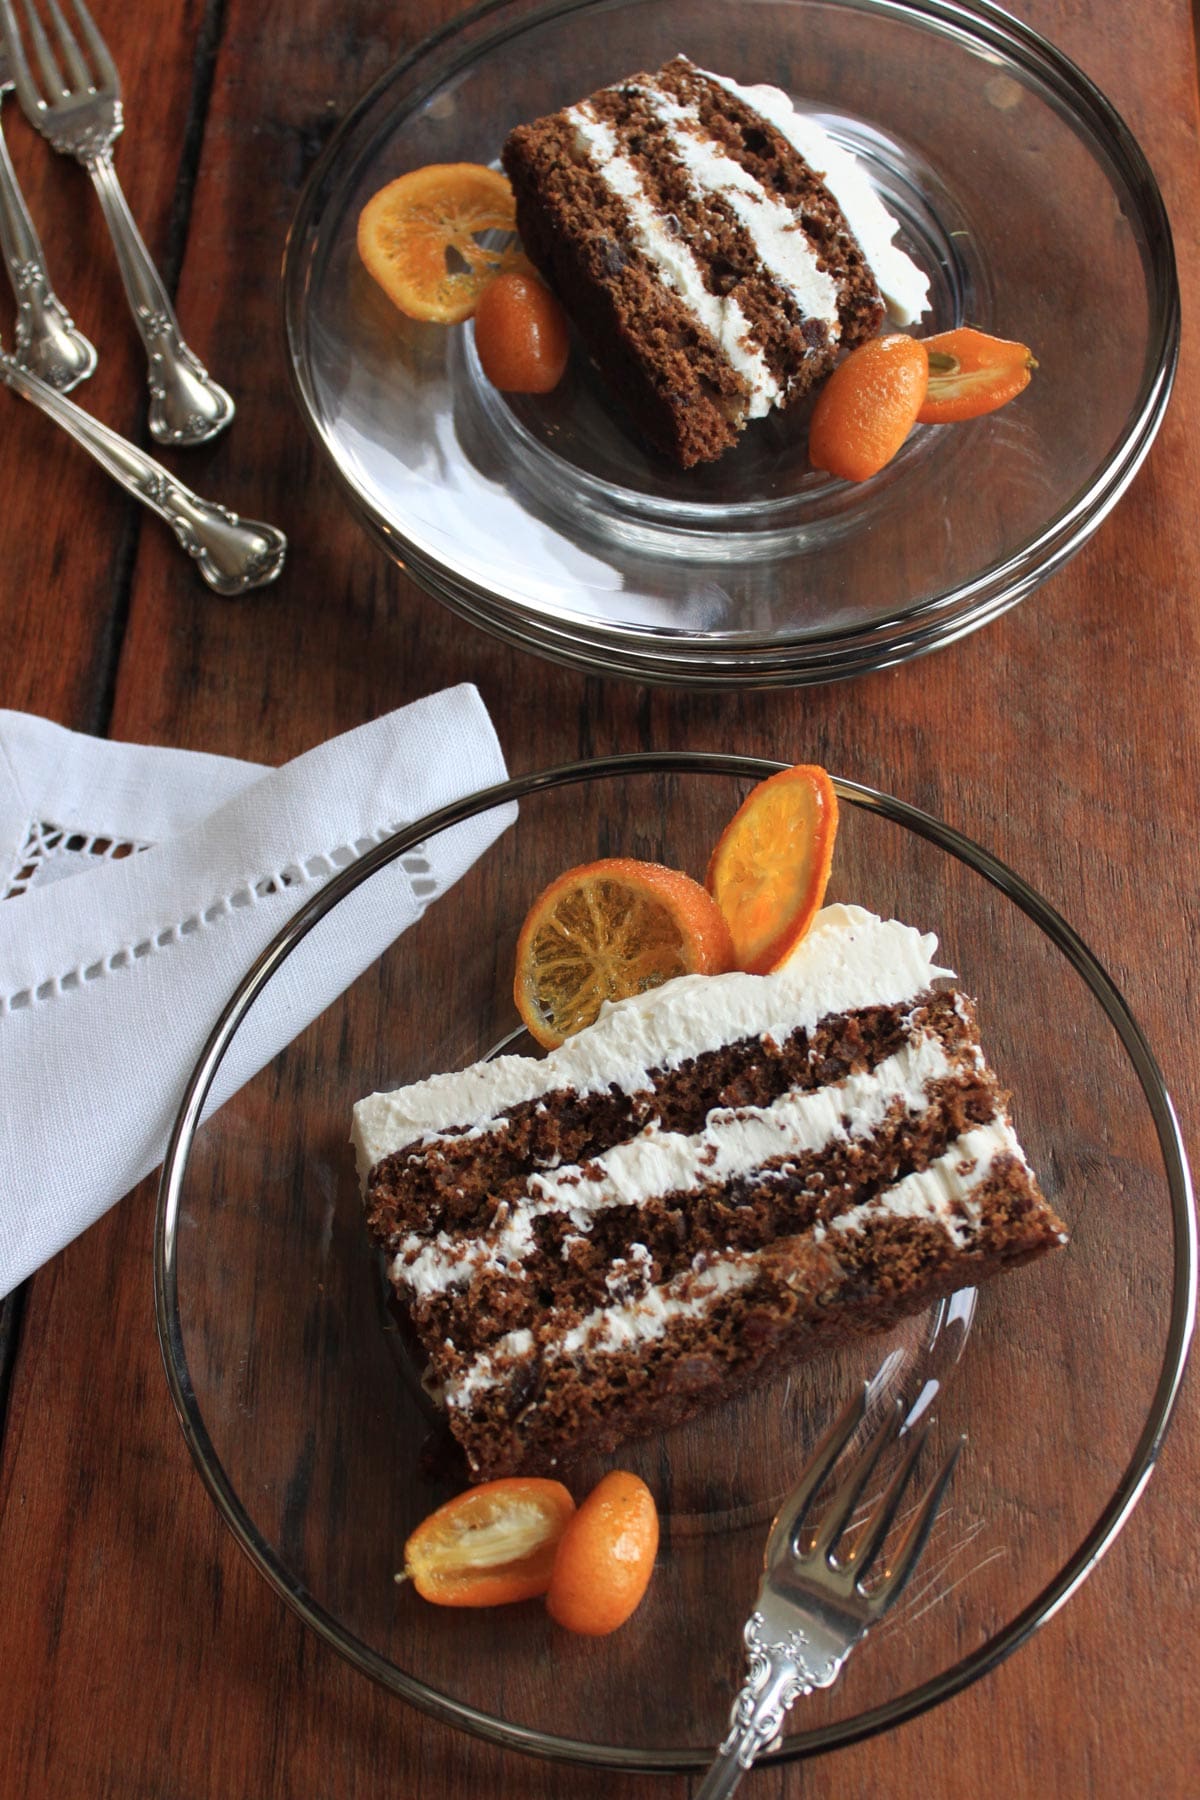
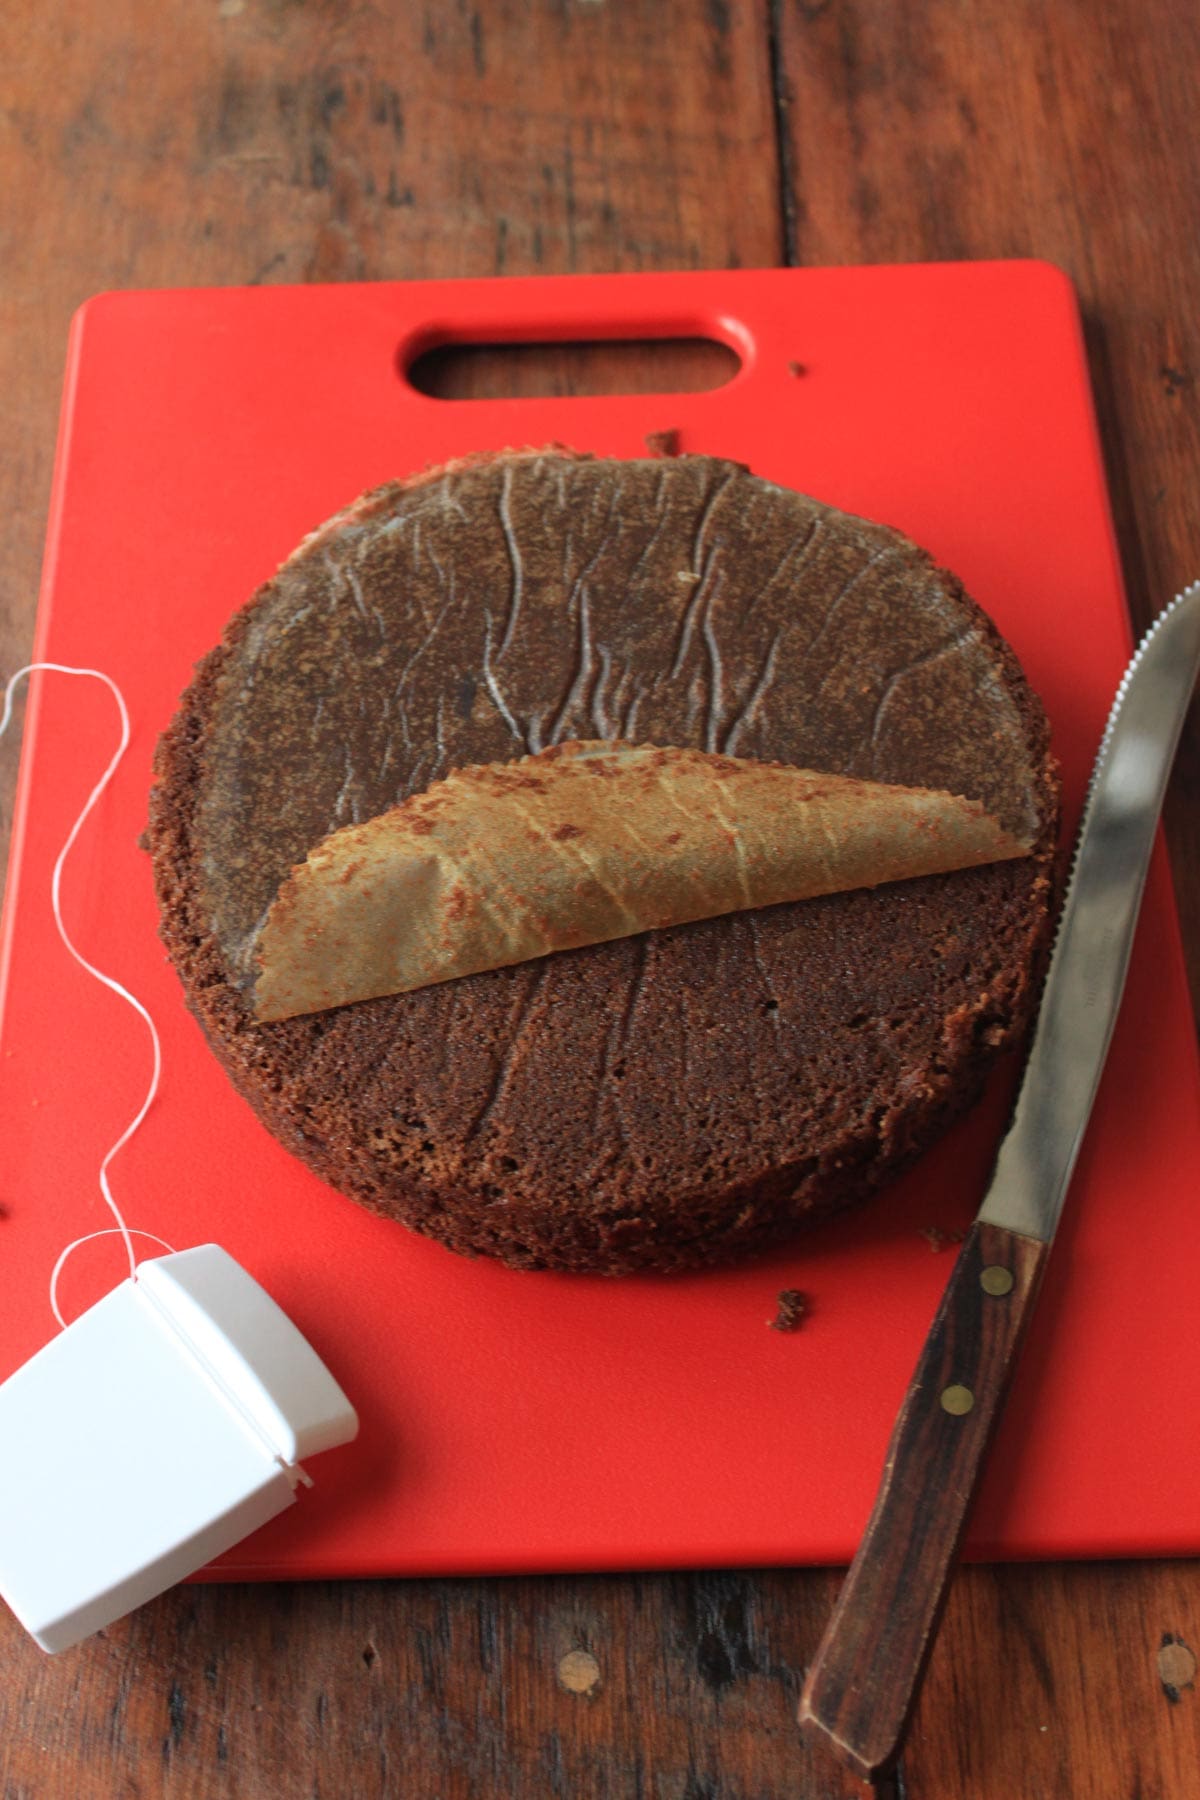
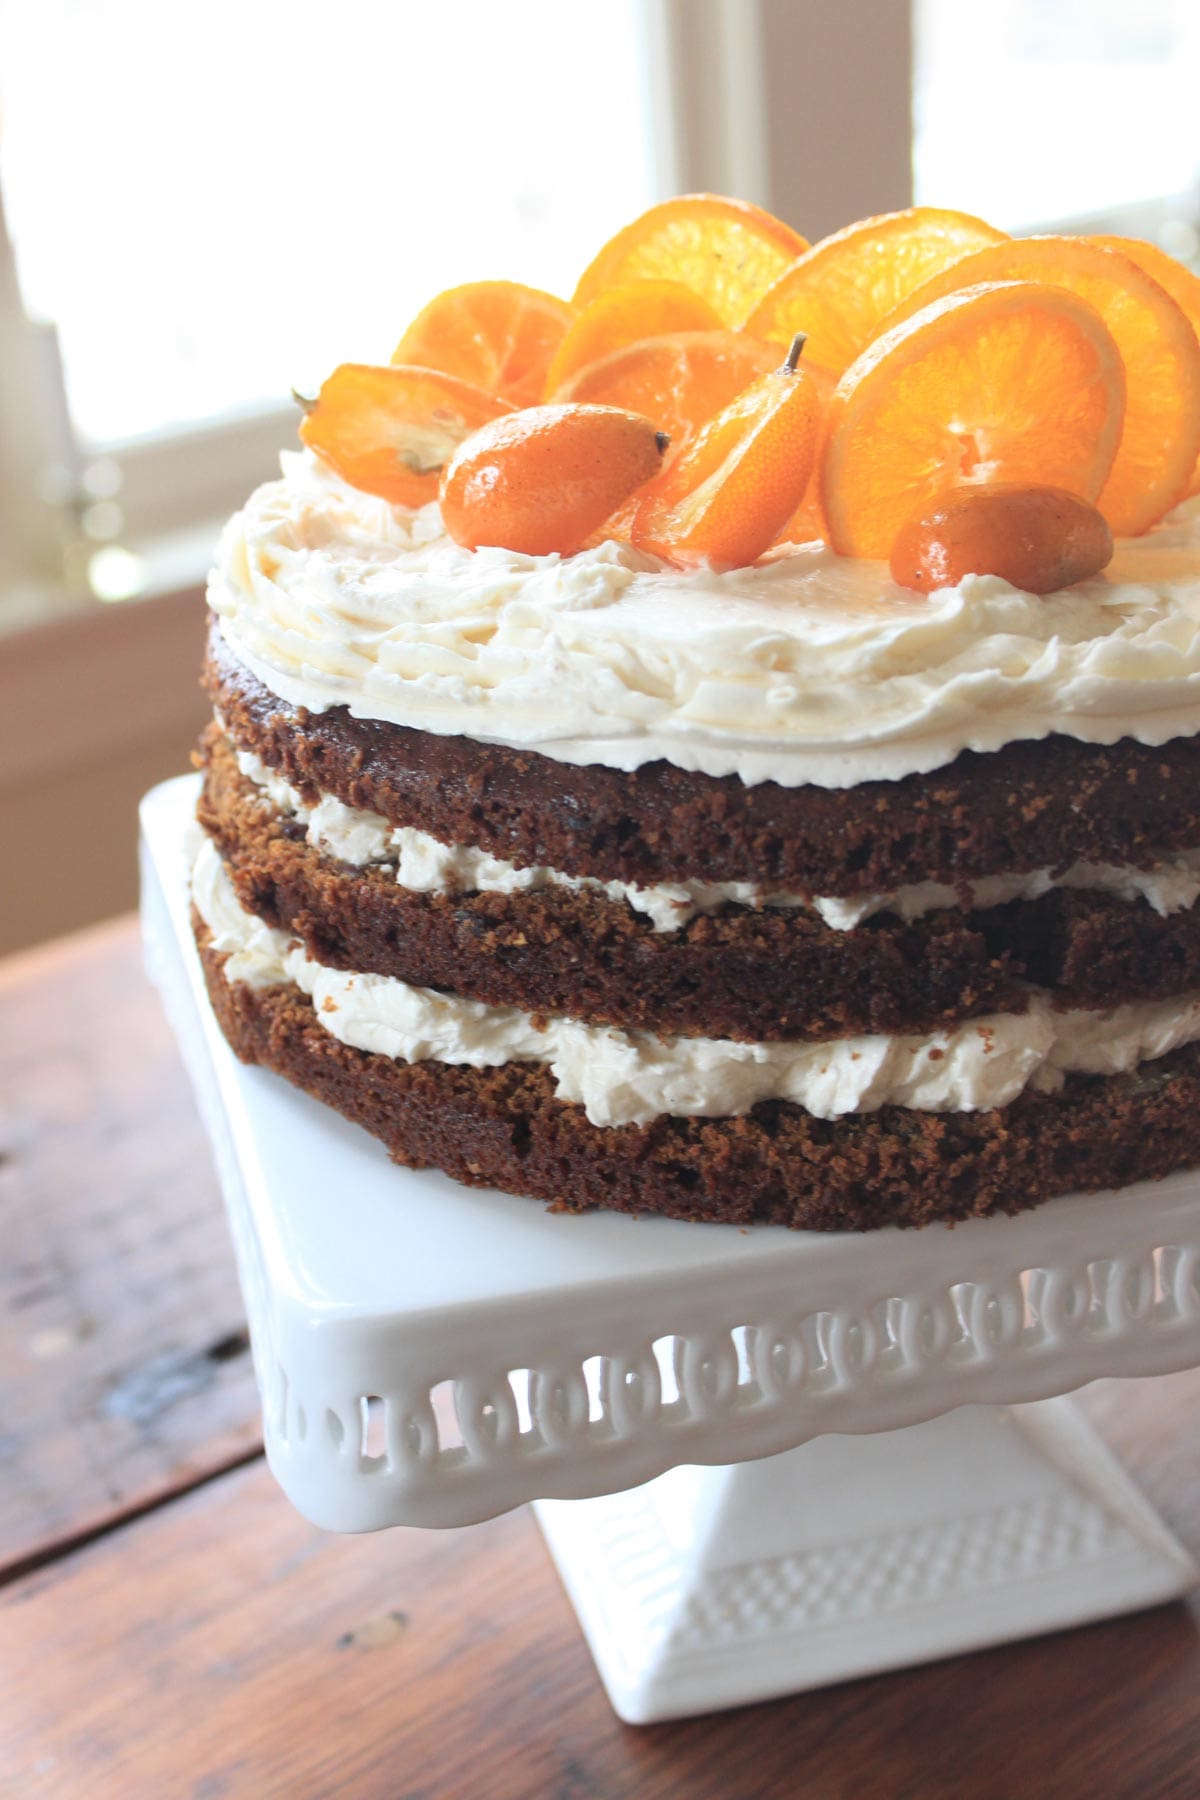
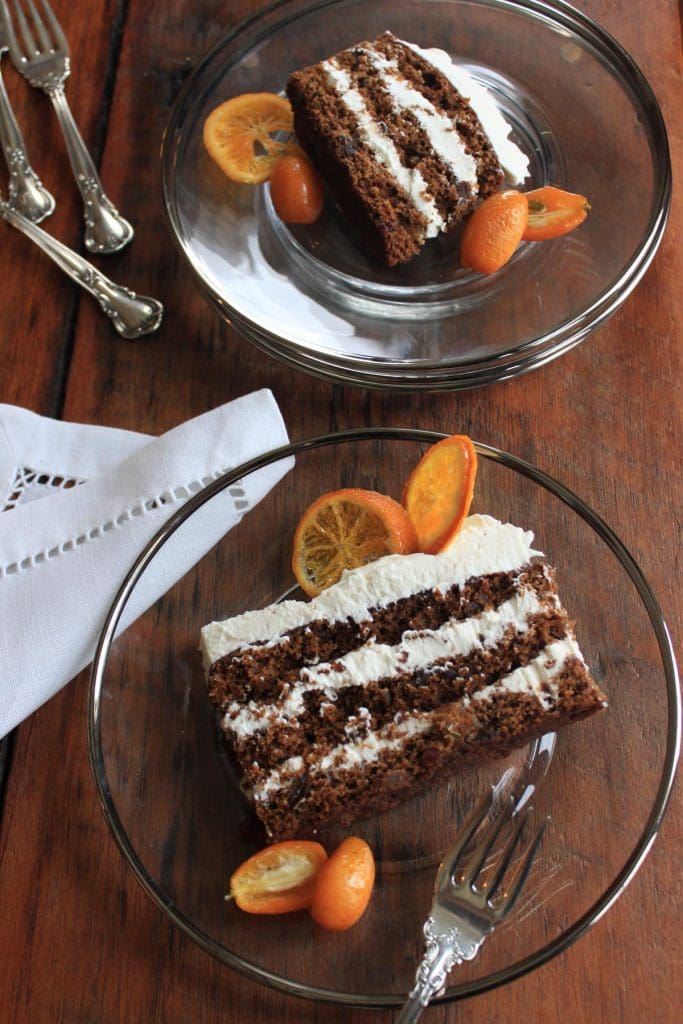
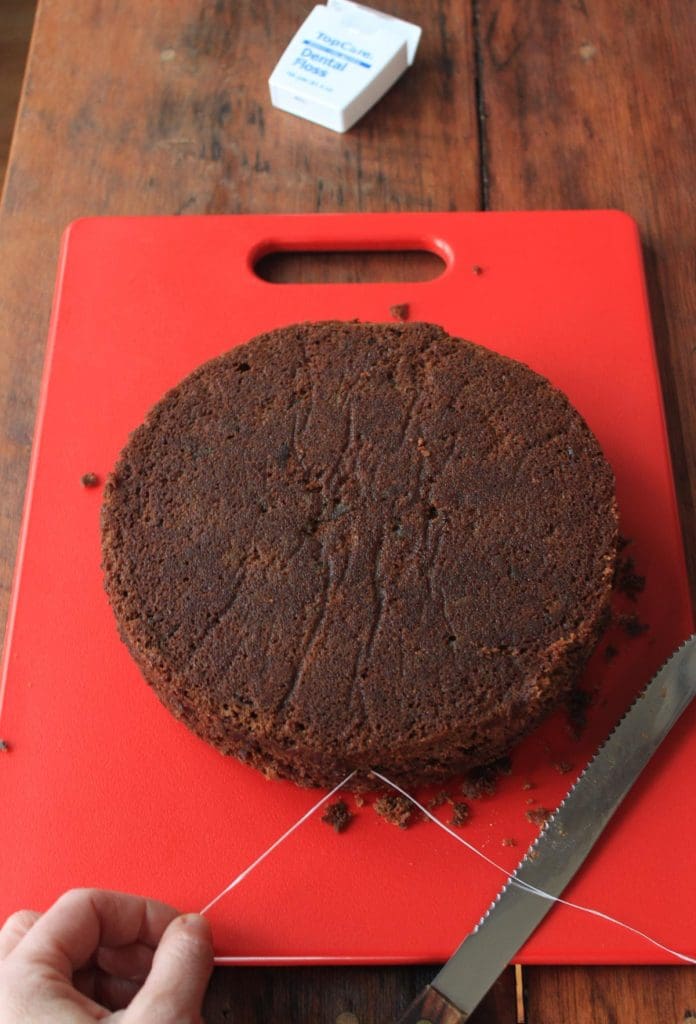
4 | Serve (or fill and serve) the cakes. As noted above, these cakes are super moist on their own and really need no added frosting to “wash” them down. But I’m the more-is-more type, so I slathered my cake this year with Eggnog Buttercream. The cake you see to the right (fourth photo) was actually constructed by splitting just one of the 9-inch cakes into three layers, and I used most of 1 buttercream recipe to fill and top it (along with candied citrus, obviously). Some tips on splitting cakes, especially into very thin layers like these: (1) Make sure any chunky add-ins, such as the nuts and dates in this case, are chopped more finely than specified above (big chunks can lead to uneven splitting) and (2) if you don’t have a knife with a blade that spans the whole cake (heck, even if you do), don’t try to cut all the way across. Instead, use the dental floss trick pictured to the right (second and third photos). I promise you, there’s nothing better for cutting very thin, even layers – short of some complicated machine!
Simply score around the sides with a knife to mark how thick you want each layer. By “score,” I mean cut all around the cake about 1/8 inch or so into it, just deep enough to lodge a long piece of dental floss into the groove you’ve created. Anchor the midpoint of the floss into the groove, starting with the edge of the cake furthest from you; then bring the ends of the floss together so they cross over in front of you. Continue to pull on the ends of the crisscrossed floss until the floss on the back side of the cake works itself all the way through the cake, thereby slicing it. Gently lift off the layer with the support of a wide spatula, and continue to slice more layers, as desired. Then use as much or as little buttercream as you like to piece the layers back together. Again, I’m a more-is-more person, so I indulged in a lot!